
Cat Collage Art: A Paper Project You Can Make
Make a paper cat collage with a simple outline, layered shapes and everyday materials. Follow the cutting, arranging and gluing steps to a finished piece.
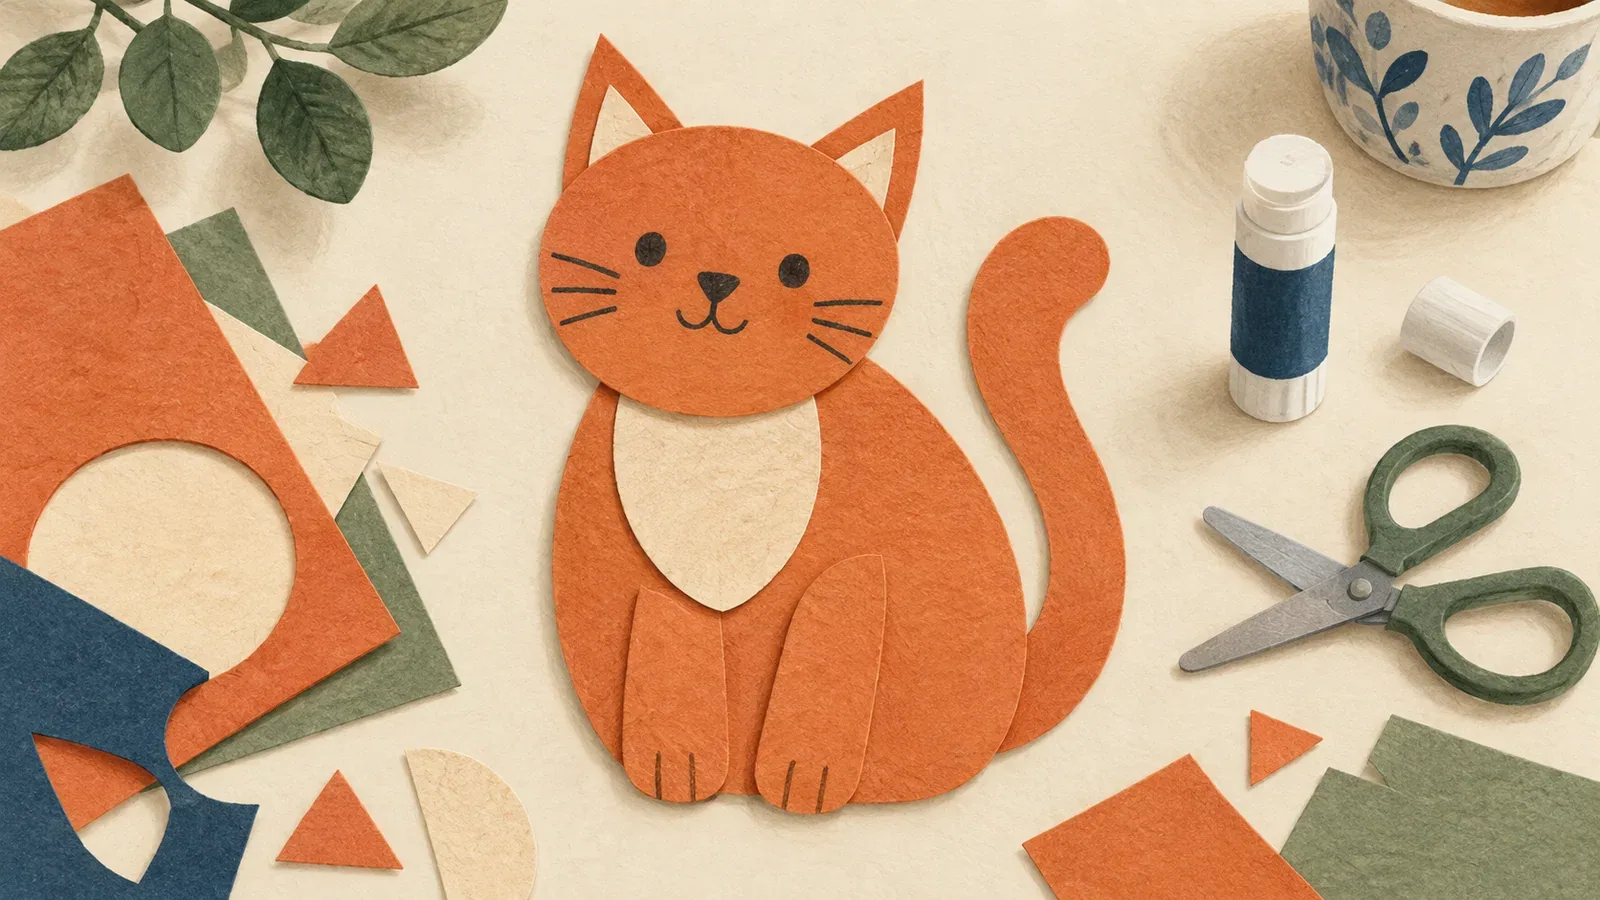
Table of Contents
Make a paper cat collage by separating the cat into a few large shapes: body, head, ears, tail and markings. Arrange them on a background before gluing. A recognizable outline and one distinctive patch can make a more personal picture than dozens of tiny pieces.
This project includes an original printable shape sheet. The sheet is a cutting guide, not a photograph of a finished physical collage; test the arrangement with your own paper before attaching it.
Gather materials and choose the shape
You will need a sheet for the background, two or three colors of scrap paper, a pencil, scissors, a ruler and adhesive suitable for your papers. Use a duplicate of a cat photo as a reference rather than cutting the only copy.
Open the cat collage shape sheet and print it in portrait orientation. The shapes are intentionally simple. You can print at a smaller scale for a card or enlarge the drawing in an editor for a larger project. There is a 1-inch check line if you print at 100% on US Letter paper.
Choose the cat's pose before choosing a palette. This template uses a seated body and a separate curled tail. For a sleeping cat, draw a large oval body and a smaller head instead, keeping the same idea of separate large pieces.
Cut the main shapes
Use the printed shapes as patterns on your colored paper. Cut the body first, then the head and ears. The two triangular ears sit behind the head; their lower edges will be covered. Cut the tail as a broad curved piece rather than a thin strip that is difficult to handle.
Place each piece on the background after cutting it. Do not glue yet. Rotate the head a little or move it closer to the body to change the pose. Keep the lower part of the head overlapping the body so the silhouette reads as one animal.
If using scissors with a child, choose tools and supervision appropriate to the child. The project does not require a craft knife. Larger pieces make an easier starting point than narrow whiskers or individual toes.
Arrange the layers before gluing
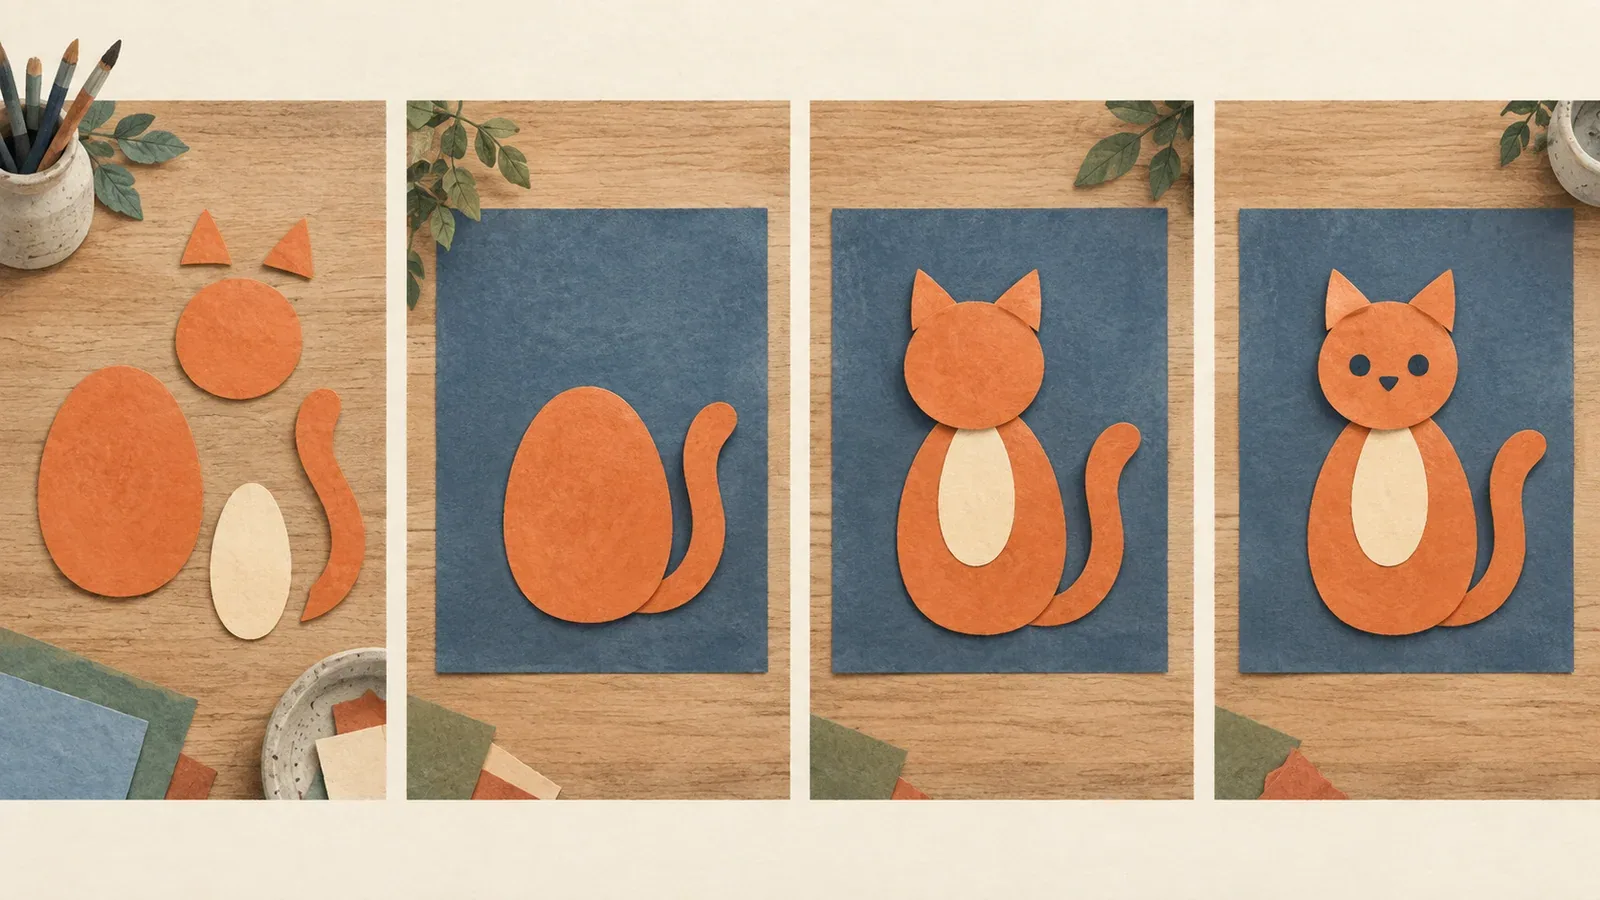
AI-generated construction guide: arrange the large pieces first, then add the face and markings. Adapt the arrangement to your cut pieces.
Try this order from back to front:
- Background shape or a simple patch of color.
- Tail, placed behind the body.
- Body, covering the tail's join.
- Ears, with their bases behind the head.
- Head and any chest patch.
- Facial markings and drawn details.
Take a quick photograph of the loose arrangement so you can reconstruct it. Move the pieces one at a time, apply adhesive according to its instructions, and return them to their positions. Work from the back layer forward.
If the layout feels crowded, remove a background element before cutting the cat smaller. Some blank space around the ears and tail helps the pose stay clear.
Add the markings that make it your cat
Pick two or three visible features from the reference. A white chin, a forehead stripe, a dark ear or a broad chest patch may be enough. Draw small marks with a pencil or pen instead of cutting every detail from paper.
For a tuxedo cat, add a single light chest shape and a small muzzle patch. For an orange cat, try a warm body with darker paper stripes. For a tabby, keep the stripes broad enough to read from a little distance. These are simplified design choices rather than an anatomical tracing exercise.
Leave the eyes until the head is attached. Check their spacing against the head shape before making dark marks. You can use closed-eye curves for a resting expression if small paper eyes are too fiddly.
Finish and display the collage
Let the adhesive dry according to its instructions before moving the piece. Check for loose corners and avoid pressing wet glue onto another surface. Add the cat's name and the maker's date on the back if you want to remember when it was made.
Photograph the collage in even light if you want to share a digital copy. A framed display needs enough room for the layers; do not force a raised paper piece tightly against the glazing.
If the project becomes a gift, add a sentence about why you chose the pose. The collage's interest comes from the paper, arrangement and small choices you make yourself.
Make a personalized digital collage gift
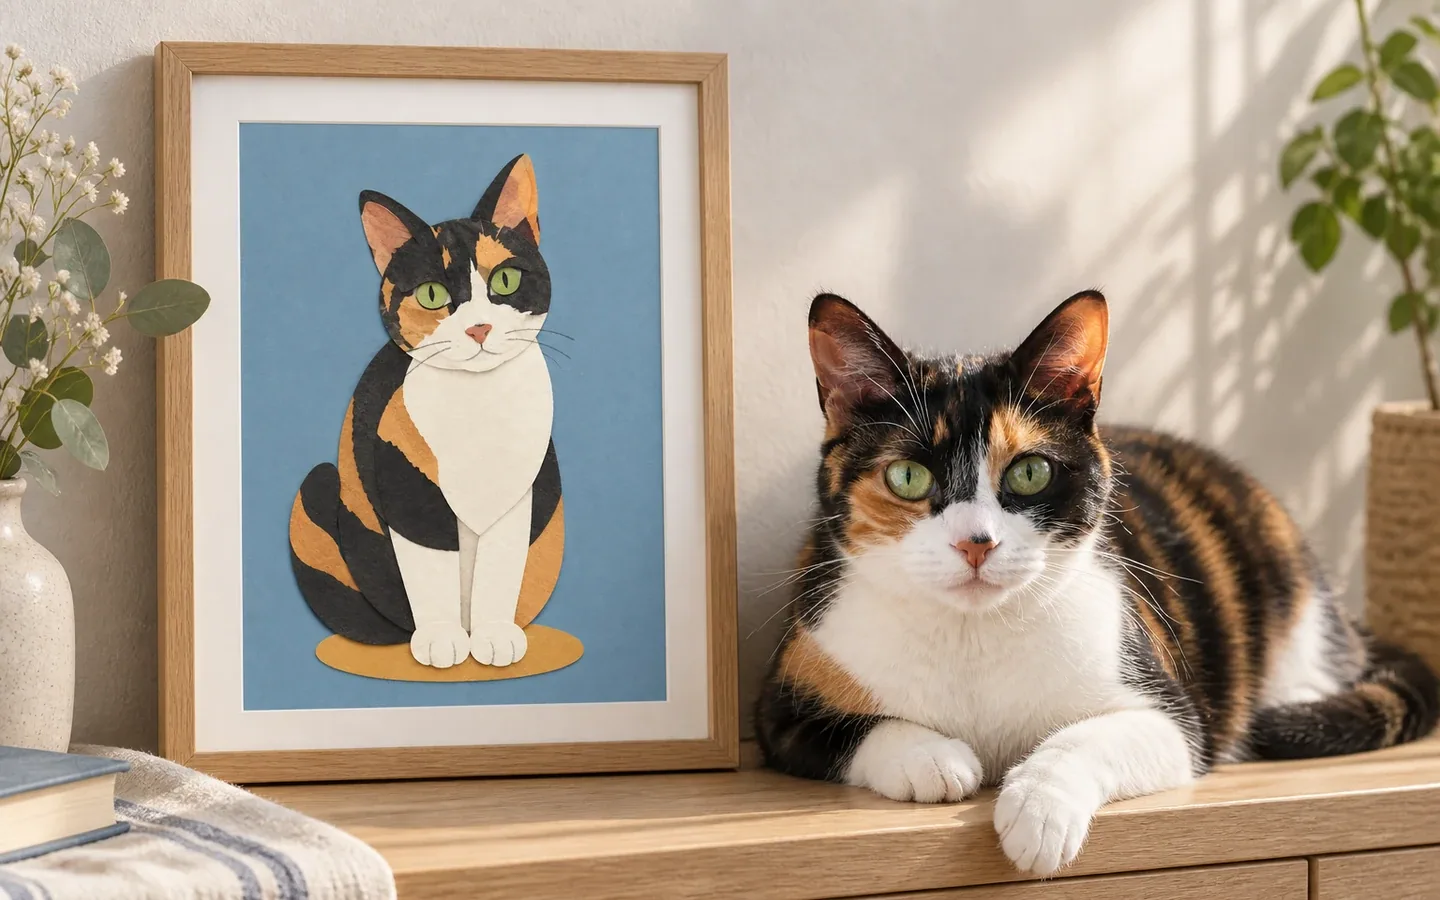
For a picture with this rounded, cut-paper look made from your own cat photo, try Cut-Paper Collage. It turns the body, head, paws and tail into large overlapping paper shapes, then uses your cat's eye color and distinctive coat patches to make the result personal. A few pencil-like details and visible paper fibers finish the effect.
Cut-Paper Collage Cat Portrait
A paper-craft look, with your own cat’s markings
Rounded paper pieces, a dusty-blue background and simple facial details echo this project. See the original cat photo beside its finished collage, then use one clear photo to make your own digital portrait.
Create my cat’s portraitChoose a clear photo with both ears visible and enough light to see the face and coat patches. The style defaults to a 4:5 portrait and costs 5 credits per generation. You receive a watermark-free digital image with a paper-collage effect. The framed scene above is a display illustration; a physical collage, frame, printing and shipping are not included.
You can share the downloaded image as a digital gift, or prepare the file for printing and add your own frame. For a hands-on gift, use the shape sheet and assembly steps above: the generated image does not provide separate cut pieces or a measured cutting pattern.
Cat portrait tutorials, creative gift ideas, and new styles from the Frameow team.